
Stop the Corrosion: How to Clean Salt from Running Earbuds (Step-by-Step)
If you’re a runner, you’ve probably experienced this frustrating moment: your wireless earbuds suddenly stop charging. You clean the case, reconnect Bluetooth, reset everything… and still nothing. The hidden culprit is often salt from sweat.
Sweat isn’t just water — it contains salt and minerals that slowly corrode the copper charging pins inside your earbuds and case. Over time, this corrosion blocks electrical contact, leading to earbuds that won’t charge, connect inconsistently, or die far too early.
The good news? With a few household items and the right technique, you can safely clean salt residue and restore your earbuds before permanent damage sets in.
This step-by-step guide will show you exactly how.


The Problem: Sweat, Salt, and Silent Earbuds
During intense runs, sweat travels down your ears and into your earbuds. Even “sweat-resistant” models aren’t immune — they slow moisture down, but they don’t stop salt buildup completely.
When sweat evaporates, it leaves behind tiny salt crystals. These crystals:
- Attract moisture from the air
- Trigger corrosion on copper charging contacts
- Create poor electrical connections
- Eventually prevent charging altogether
If your earbuds charge only when positioned “just right” or stop charging randomly, salt corrosion is likely already happening.
The ‘Why’: Why High-Intensity Runners Face This More Than Casual Listeners
If you only use earbuds at your desk or on light walks, your risk is low. But runners and gym users face unique conditions:
- Constant sweat flow directly into earbuds
- Heat accelerates salt crystallization
- Frequent charging cycles expose pins repeatedly
- Earbuds stored wet in closed cases trap humidity
Over weeks or months, this combination quietly eats away at the charging contacts.
High-intensity runners are essentially putting earbuds through a daily corrosion test. Without cleaning, even premium models can fail early.
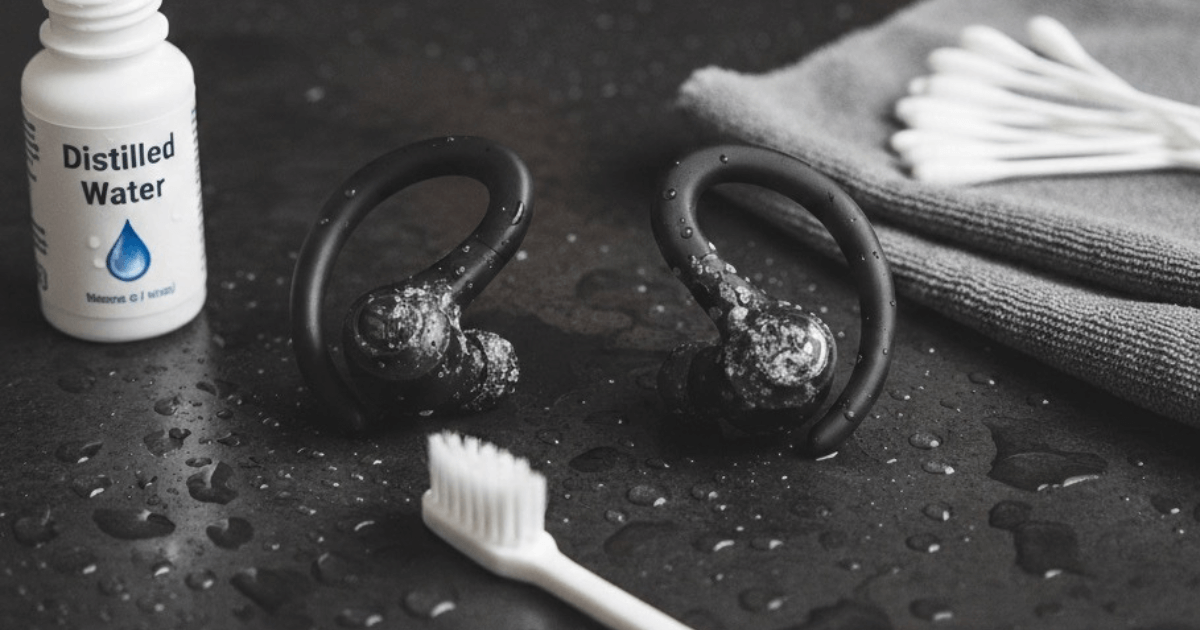
The Toolkit: What You’ll Need


You don’t need fancy tools. Most items are already in your home.
Cleaning Toolkit:
- 70% Isopropyl alcohol (pharmacy alcohol)
- Soft toothbrush (new or dedicated)
- Microfiber cloth
- Cotton swabs
- Wooden toothpick
- Paper towel
- Good lighting
Why 70% alcohol?
It dissolves salt, kills bacteria, evaporates quickly, and is safe for electronics when used properly.
Step-by-Step: How to Clean Salt from Running Earbuds
Follow these steps carefully. Never rush — moisture and electronics don’t mix.
Step 1: Power Everything Off
Remove earbuds from the case. Turn Bluetooth off on your device. Unplug the charging case.
Never clean electronics while power is connected.
Step 2: Inspect the Damage
Under good lighting, look at:
- Earbud charging pins
- Case charging contacts
- Speaker mesh
- Rubber ear tips
If you see:
- White crusty residue
- Greenish or dark spots
- Sticky film
That’s salt corrosion starting.
Step 3: Dry Wipe First
Use a dry microfiber cloth to gently wipe:
- Earbud bodies
- Case interior
- Charging pins
This removes loose debris before wet cleaning.
Step 4: Alcohol Brush Cleaning
Dip the soft toothbrush lightly in isopropyl alcohol. Shake off excess — it should be damp, not dripping.
Gently brush:
- Charging pins on earbuds
- Charging contacts inside case
Use small circular motions. Don’t press hard — let the bristles do the work.
Alcohol dissolves salt and loosens corrosion.
Step 5: Cotton Swab Detail Work
Dip a cotton swab in alcohol and squeeze excess out.
Carefully wipe:
- Inside charging ports
- Around metal contacts
- Corners of the case interior
Replace swab if it gets dirty — don’t spread residue back.
Step 6: Toothpick for Stubborn Crystals
If you see hardened salt crystals:
- Use a wooden toothpick
- Gently scrape residue
- Never use metal objects (they scratch contacts)
This step removes buildup alcohol can’t fully dissolve alone.
Step 7: Clean Ear Tips and Mesh
Remove silicone ear tips.
- Wash tips with warm water and mild soap
- Dry completely
For speaker mesh:
- Lightly dab with alcohol swab
- Don’t push liquid into the mesh
Salt often hides here too.
Step 8: Final Drying
Place earbuds and case on a paper towel.
Let them air-dry at least 30–60 minutes.
Alcohol evaporates fast, but trapped moisture can remain in tiny gaps. Patience prevents short circuits.
Step 9: Test Charging
Once fully dry:
- Place earbuds in case
- Plug in charger
- Check charging indicator
If charging is restored — success 🎉
If not, repeat cleaning once more. Severe corrosion may require replacement.
Prevention: Keep Salt From Coming Back
Cleaning once helps — preventing future buildup saves your earbuds long-term.
Dry Earbuds Before Storing
After each run:
- Wipe earbuds with a cloth
- Let them air dry 10–15 minutes
- Only then place in charging case
Never store wet earbuds in a closed case.
Weekly Quick Wipe
Once per week:
- Quick alcohol wipe on charging pins
- 30-second maintenance saves months of lifespan
Rotate Ear Tips
Clean silicone tips regularly — trapped sweat drips back into speaker housing.
Avoid Charging Immediately Post-Run
Hot, humid earbuds + charging = corrosion accelerator. Let them cool first.
Store Case Open Occasionally
Leaving the case open overnight once per week lets trapped moisture escape.
How Often Should You Clean?
- Heavy runners (daily workouts): once per week
- Moderate runners: every 2–3 weeks
- Casual use: monthly
Consistency prevents irreversible damage.
Signs Corrosion Has Already Started
- Earbuds charge only at certain angles
- One earbud won’t charge
- Case shows blinking error lights
- Short battery life
If you catch it early, cleaning fixes it. If ignored too long, metal contacts physically erode.
Why This Works
Isopropyl alcohol:
- Dissolves salt minerals
- Removes oils and sweat residue
- Evaporates without leaving moisture
- Is safe for electronics in small amounts
Combined with gentle mechanical brushing, it restores electrical contact effectively.
Final Thoughts
Running earbuds work hard — and sweat is their silent enemy. Salt corrosion is slow, invisible, and frustrating — but totally preventable.
With a simple weekly cleaning habit, you can:
- Extend earbud lifespan
- Avoid charging failures
- Save money on replacements
- Keep your running routine uninterrupted
Your earbuds will thank you — silently, with perfect sound.
Is your pair already dead?
If corrosion has gone too far and charging no longer works, replacement may be the only option.
Check out our guide:
“Best Budget Bluetooth Earbuds for Running Under $30”
for durable, sweat-resistant options built to survive intense workouts.
Why Do My Earbuds Thump When I Run? (And How to Fix It)


Why do my earbuds make a thumping sound when I run?
If you’ve ever typed that question into Google mid-frustration after a workout, you’re not alone. That dull boom-boom-boom in your ears with every footstep can turn a perfect running playlist into an unbearable experience.
The issue isn’t your music. It isn’t even a faulty earbud. It’s a physical acoustic phenomenon called the Occlusion Effect— and once you understand it, fixing the problem becomes surprisingly easy.
This guide is written for runners who love training but hate the ruined sound quality during high-impact workouts. Let’s break down what’s happening and how to stop it.
What Causes Earbuds to Thump While Running?
The culprit is the Occlusion Effect.
When you insert in-ear earbuds, they seal your ear canal. This seal is great for blocking outside noise — but it also traps internal vibrations. When your foot hits the ground during a run, the impact travels through your body as mechanical vibration. Some of that vibration reaches your skull and ear canal.
Normally, those vibrations escape harmlessly. But when your ear canal is sealed by earbuds, the vibrations get trapped and amplified, producing the deep thumping or booming sound you hear with every step.
In short:
Sealed ear canal + body impact vibrations = thumping noise
The faster and harder you run, the stronger the effect becomes. That’s why runners experience this far more than casual listeners.
Why Some Earbuds Are Worse Than Others
Not all earbuds create the same occlusion effect. Thumping is strongest when earbuds:
- Create a tight, airtight seal
- Use firm silicone ear tips
- Sit deep in the ear canal
- Are heavier and shift with movement
Ironically, earbuds marketed for “excellent noise isolation” often cause the worst running thump.
Is the Thumping Harmful?
No — the sound isn’t damaging your ears. But it:
- Ruins music clarity
- Distracts focus
- Encourages turning volume too high
- Makes running less enjoyable
That’s why so many runners search for solutions.
How to Fix Earbud Thumping When Running
Now the good part. You don’t need to stop using earbuds — just choose the right design or adjust how you wear them.
Solution 1: Switch to Open-Ear or Clip-On Earbuds
This is the most effective fix.
Open-ear and clip-on earbuds sit outside the ear canal instead of sealing it. Since the canal isn’t blocked, vibrations escape naturally — meaning no occlusion effect and no thumping.
Benefits for runners:
- Zero booming footstep noise
- Better environmental awareness for safety
- Lightweight, stable fit
- Sweat-friendly design
This is why open-ear and clip-on models are becoming the top choice for runners frustrated with sound quality during high-impact training.
Solution 2: Use Foam Tips Instead of Silicone
If you prefer traditional in-ear earbuds, switch from silicone tips to memory foam tips.
Foam tips:
- Absorb vibration instead of transferring it
- Create a softer seal
- Reduce internal pressure buildup
This alone can dramatically reduce thumping for many runners.
Solution 3: Adjust the Fit to Let Air Escape
Many runners push earbuds too deeply, creating a perfect airtight seal — the ideal condition for occlusion.
Try this:
- Insert earbuds slightly shallower
- Don’t force a tight vacuum seal
- Allow a tiny bit of airflow
A looser seal often reduces the thump without causing earbuds to fall out.
Solution 4: Use Ear Hooks or Wings
If earbuds bounce while you run, they generate additional mechanical noise. Ear hooks or stabilizing fins keep them steady, reducing impact vibration transfer.
Why Open-Ear Designs Are Becoming the Runner’s Favorite
Runners want:
- No thumping
- Good sound clarity
- Secure fit
- Awareness of surroundings
Open-ear and clip-on earbuds check all four boxes. That’s why marathoners, trail runners, and gym athletes increasingly ditch sealed in-ear models altogether.
Sound isolation is lower — but when you’re running outdoors, that’s actually a safety benefit.
Quick Troubleshooting Checklist
Loud booming every step?
→ Switch to open-ear or clip-on earbuds.
Mild thump only on long runs?
→ Try foam tips.
Earbuds feel deeply sealed?
→ Adjust insertion depth.
Earbuds bounce when running?
→ Add ear hooks or choose lighter models.
Final Thoughts
So, why do your earbuds make a thumping sound when you run?
Because sealed ear canals trap vibration — the Occlusion Effect in action.
The solution isn’t to stop running or stop listening to music. It’s choosing the right earbud design for high-impact movement. Whether that means foam tips, a looser fit, or switching entirely to open-ear models, relief is easy once you know what to change.
Your workouts should sound energizing — not like a drumline in your skull.
🎧 Call to Action: The Ultimate Fix
If you want a permanent solution to running earbud thumping, open-ear and clip-on models are the answer.
👉 Check out our guide:
“Best Clip-On Earbuds Under $50”
It’s the perfect resource for runners who want clear sound, zero thumping, and a secure fit — without spending a fortune.
FAQ: Cleaning Salt from Running Earbuds
Why does sweat damage my earbuds?
Sweat contains salt and minerals. When sweat dries, salt crystals remain on charging pins and speaker meshes. These attract moisture and cause corrosion, which blocks proper electrical contact and eventually prevents charging.
How do I know if salt corrosion is affecting my earbuds?
Common signs include:
- Earbuds not charging consistently
- One earbud charging while the other doesn’t
- Charging only when positioned at certain angles
- Visible white or greenish residue on charging contacts
Can I use water instead of alcohol to clean my earbuds?
No. Water can seep into internal components and cause short circuits. Isopropyl alcohol evaporates quickly and safely dissolves salt without leaving moisture behind.
Why is 70% isopropyl alcohol recommended instead of 99%?
70% alcohol contains a small amount of water that helps dissolve salt more effectively. It also evaporates safely without damaging electronic components.
How often should I clean my running earbuds?
- Daily runners: once per week
- Occasional runners: every 2–3 weeks
- Casual users: once per month
Regular cleaning prevents permanent corrosion.
Can I clean the speaker mesh the same way as charging pins?
Yes, but gently. Lightly dab with an alcohol-moistened cotton swab. Never pour liquid or push moisture into the mesh.
What if my earbuds still won’t charge after cleaning?
If corrosion has already eaten away the metal contacts, cleaning won’t restore them. In that case, replacement is usually the only solution.
Will cleaning void my warranty?
Basic surface cleaning with alcohol typically doesn’t void warranties. However, visible internal water damage does — so always avoid soaking.
Can sweat-resistant earbuds still suffer from salt corrosion?
Yes. “Sweat-resistant” means moisture protection, not salt-proof. Salt buildup still occurs over time if earbuds aren’t dried and cleaned.
What’s the easiest way to prevent future salt damage?
Wipe earbuds after every run and let them dry before placing them in the charging case. This one habit dramatically slows corrosion.